How to Effortlessly Add a New Sequence in Premiere Pro
Have you ever encountered a situation where you’re diligently editing your Premiere Pro project, but suddenly realize that you need to insert a new sequence for an additional segment? Don’t fret! Adding a new sequence in Premiere Pro is a straightforward task that can be accomplished in just a few simple steps. In this comprehensive article, we’ll guide you through the process, providing clear instructions and expert advice to ensure you master this essential editing technique.
Before we delve into the details, let’s first take a moment to understand the concept of sequences in Premiere Pro. A sequence is essentially a container that holds all the video clips, audio tracks, and other elements that make up your project. Each sequence has its own settings, such as resolution, frame rate, and aspect ratio. Understanding this fundamental aspect of Premiere Pro will aid in your comprehension of the subsequent steps.
Creating a New Sequence: A Step-by-Step Guide
1. Navigate to the File Menu: Begin by clicking on the “File” menu located in the top menu bar of Premiere Pro. From the drop-down list, select “New” and then “Sequence…”
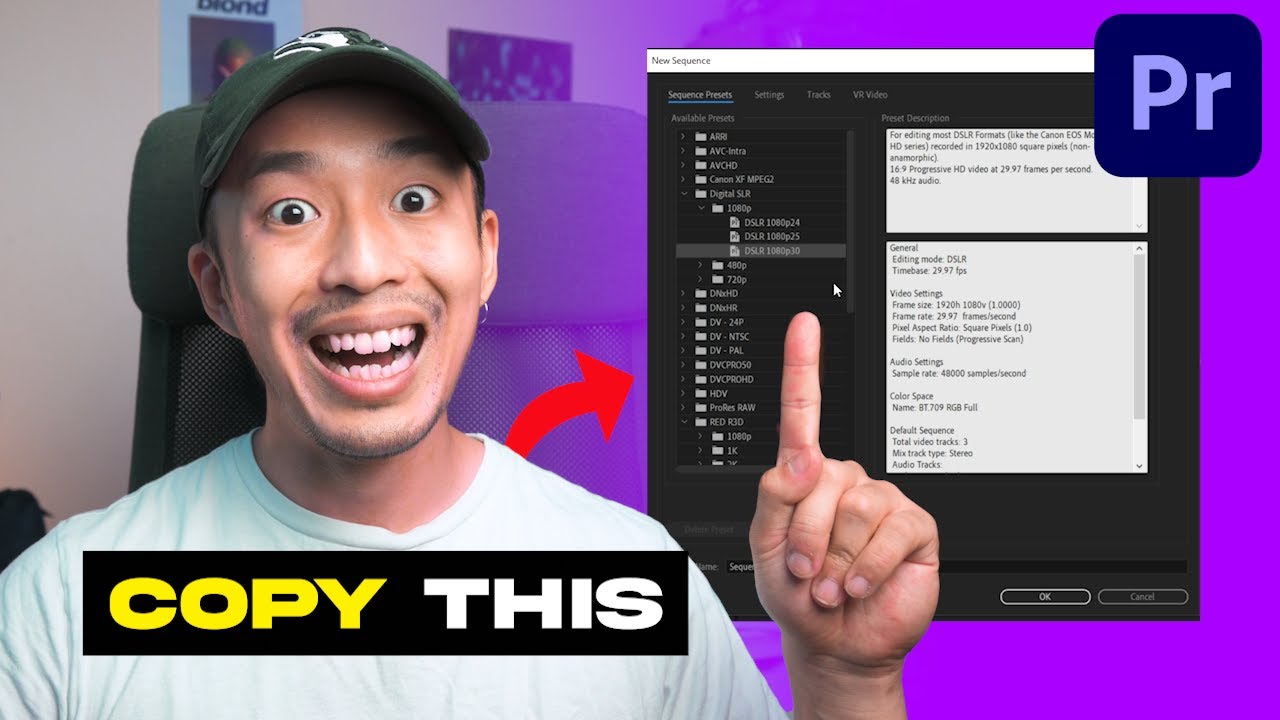
2. Configure Sequence Settings: In the “New Sequence” dialog box that appears, you can customize the settings for your new sequence. Specify the desired resolution, frame rate, and aspect ratio to match your project requirements. If you’re unsure about these settings, you can select one of the presets provided by Premiere Pro.
3. Name and Save Sequence: Assign a suitable name for your new sequence in the “Sequence Name” field. It’s recommended to use descriptive names to easily identify the purpose of each sequence in your project. Once you’re satisfied with the settings, click the “OK” button to create the new sequence.
Adding Clips to Your New Sequence
Now that you have created a new sequence, it’s time to add the video clips and other elements you want to include. There are multiple ways to achieve this:
- Drag and Drop: Directly drag and drop the desired clips from the Project panel onto the new sequence in the Timeline panel.
- File > Import: Navigate to “File” > “Import” in the menu bar, locate the clips you want to import, and click “Open”.
- Media Browser: Utilize the Media Browser (located on the left-hand side of the Premiere Pro interface) to browse and select clips, then drag them onto the sequence.
Expert Tips and Advice
1. Organize Sequences: To maintain a well-structured project, consider creating separate sequences for different sections, such as intro, body, and outro. This approach allows for easier management and editing.
2. Use Nested Sequences: For complex projects, consider using nested sequences to organize and group related elements. This technique helps keep your timeline clean and manageable.
Frequently Asked Questions (FAQs)
- Q: Can I change the settings of an existing sequence?
A: Yes, you can modify the settings of an existing sequence by right-clicking on the sequence in the Timeline panel and selecting “Sequence Settings”. - Q: What is the difference between a sequence and a project?
A: A project is the overarching container for your entire video editing project, while a sequence is a specific timeline within that project that contains the video clips, audio tracks, and other elements. - Q: Can I import sequences from other projects?
A: Yes, it is possible to import sequences from other Premiere Pro projects. Go to “File” > “Import” and select the desired sequence file.
Conclusion: Enhancing Your Workflow with New Sequences
Mastering the skill of adding new sequences in Premiere Pro not only simplifies your editing workflow but also enables you to organize and structure your projects effectively. By following the steps outlined in this comprehensive guide, you’ll be well-equipped to elevate your video editing skills and produce polished and engaging content.
Tell us, are you ready to explore the world of sequences in Premiere Pro and enhance your video creations? Leave a comment below with your thoughts and questions, and we’ll be delighted to continue the conversation. Happy editing!
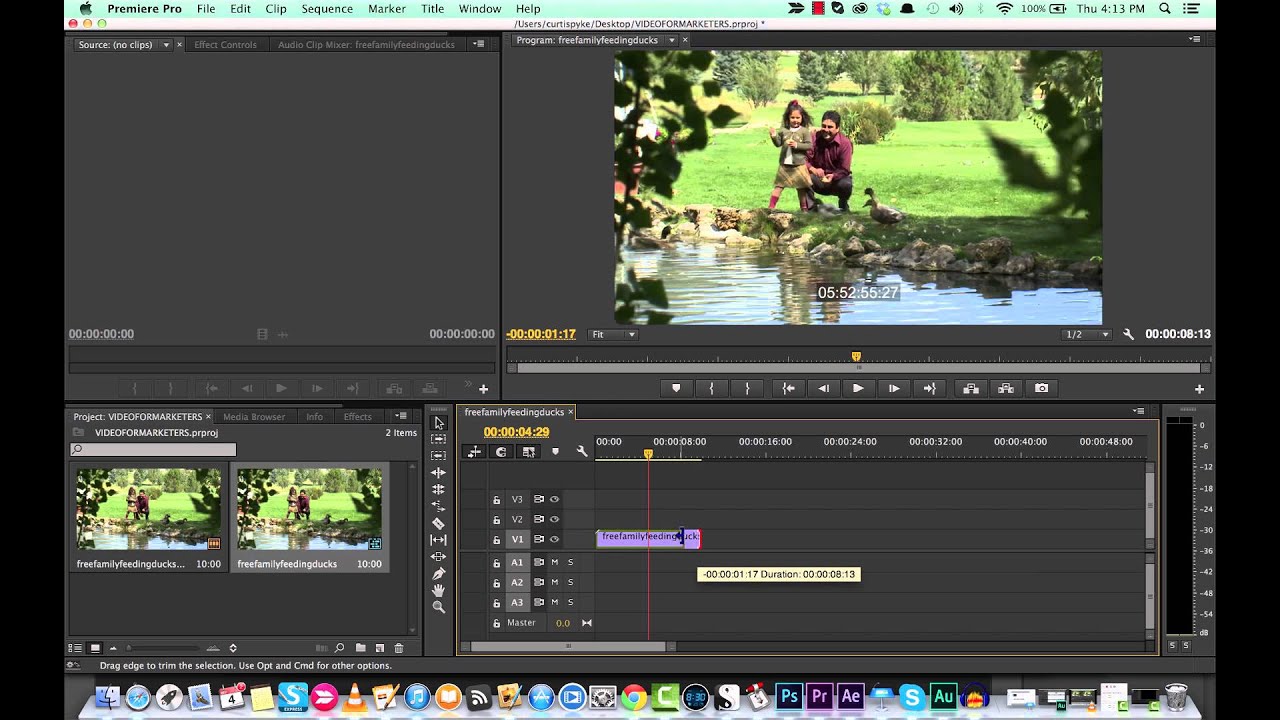
Image: www.youtube.com

Image: www.youtube.com
Creating a Sequence in Premiere Pro | Curious.com Dec 28, 2022What you learned: Create a sequence. To create a new sequence, click the New Item menu in the Project panel and choose Sequence from the drop-down menu.Choose a preset based on the camera you used to record your videos. Don’t worry if you choose the wrong setting; the first time you add a clip to the sequence, you can choose to adjust the settings to match the clip.
